The 10 Best Lawn Edgers
The 10 Best Lawn Edgers


Starting seeds indoors is one of my favorite parts of the year. It’s that first little promise of spring when there’s still snow on the ground. But I’ve learned the hard way that a flimsy, cracked tray can ruin a whole batch of seedlings before they even get going.
You need something that holds water without leaking, gives your seedlings enough room, and ideally, will last you more than one season. I’ve gone through a bunch of different gardening trays over the years, from the cheap disposables to the buy-it-for-life kind. These are the ones that have actually worked for me in my garden shed.
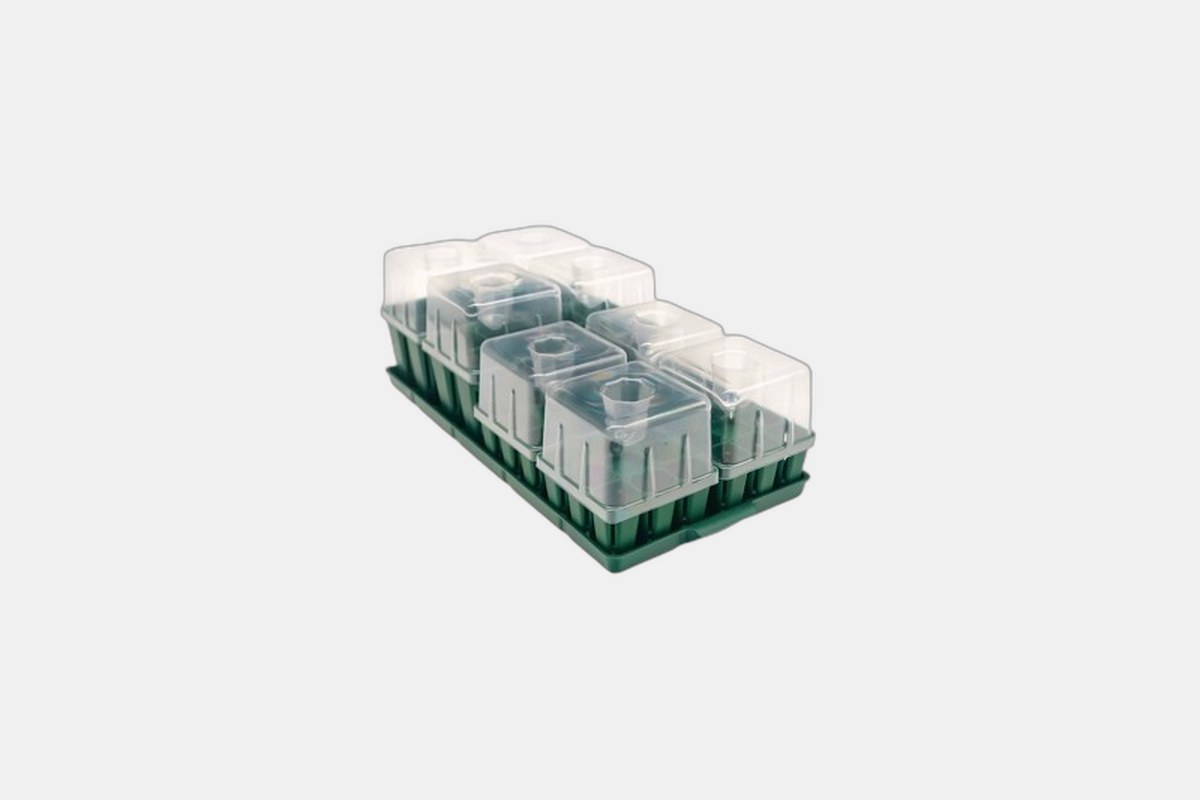
The Vego kit costs around $50, and it’s built for someone who is serious about starting seeds. This isn’t your average flimsy plastic tray. It feels like a professional piece of equipment that’s going to last for years.
What I really like are the individual dome covers for each seedling pod. This lets me give my humidity-loving peppers a different environment than my lettuces right next to them. The air-pruning slits and drip irrigation are smart features that help develop strong roots and make watering foolproof.
The Downside: The price is steep upfront. It’s an investment, but if you’re tired of buying new trays every spring, it’s worth considering.
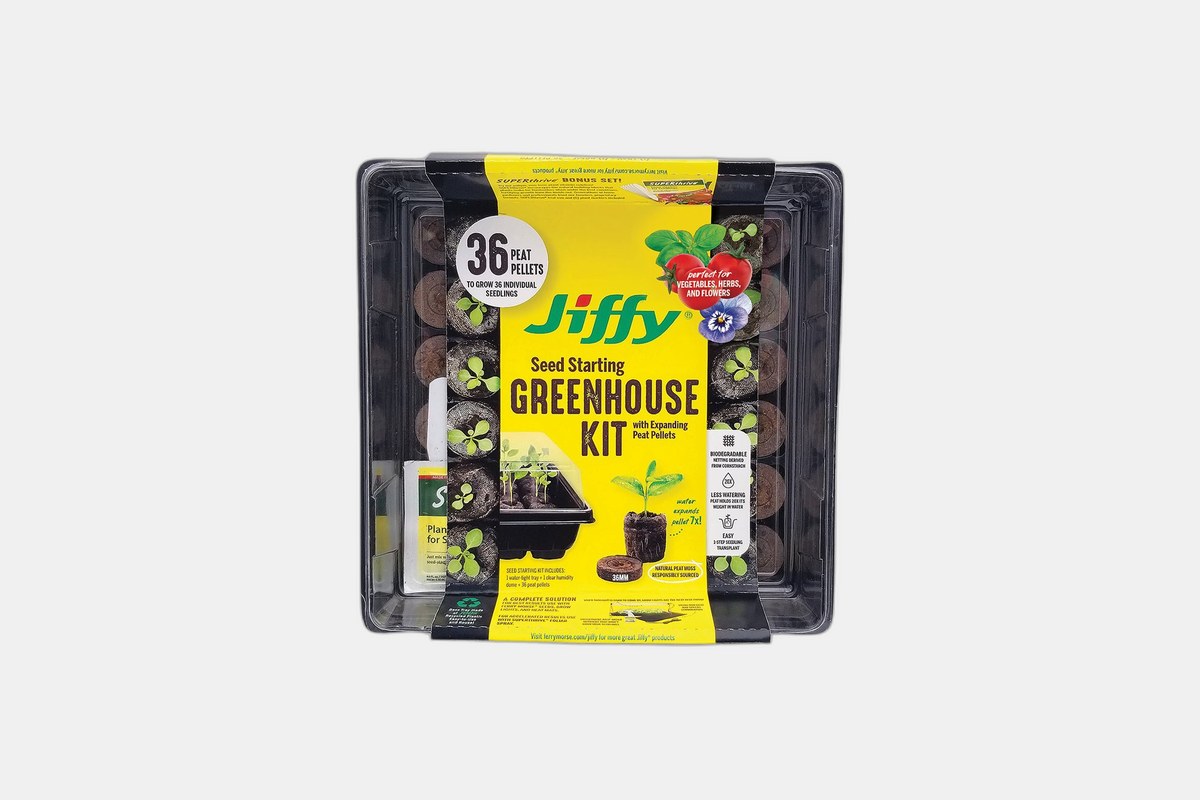
At about $15, this Jiffy kit is how a lot of us got started. It’s an all-in-one package that’s perfect if you’re new to gardening or just want to start a few herbs on the windowsill.
You just add water to the little peat pellets and they puff up, ready for seeds. There’s no messing with bags of soil, which is a huge plus. Because the pellet is the pot, you can plant the whole thing right in the garden, which reduces transplant shock.
The Downside: The thin plastic tray and dome are basically single-use. Don’t expect to be using this same kit next year.
This kit from Gardener’s Supply is about $25. It’s a great option for new gardeners because it takes the guesswork out of watering, which is where a lot of people go wrong.
It has a special capillary mat that wicks water up from a reservoir into the soil. Your seedlings get a consistent amount of moisture without you ever having to pour water on them from the top. The whole setup is compact and feels sturdy enough to reuse for a few seasons.
The Downside: The dome doesn’t have any built-in vents. You have to remember to prop it open or take it off completely for a while each day to let air circulate.
The Park Seed Bio Dome usually runs about $30. The big appeal here is how clean it is. Instead of dealing with loose potting mix, you use these little “bio sponges” that fit perfectly into the tray.
It’s so much faster and neater than filling individual cells with soil. The dome has adjustable vents on top, which is a nice feature for controlling the humidity and airflow as your seedlings grow. It’s a really simple and effective system.
The Downside: You have to keep buying the proprietary replacement sponges, which adds an ongoing cost that you don’t have with regular soil.
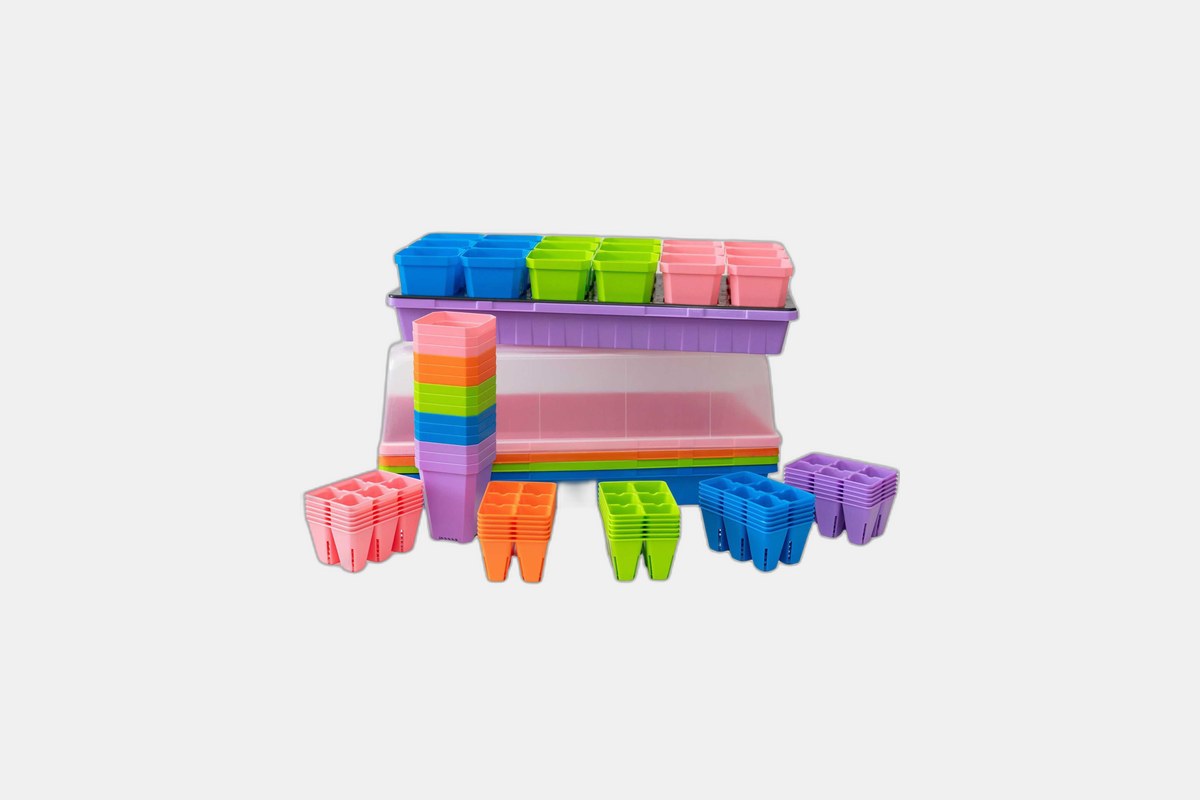
This bundle is a serious setup, coming in at around $150. If you have a big garden or a small hobby farm, Bootstrap Farmer is the way to go. Their plastic is incredibly thick and durable—you can’t twist or bend these trays.
I’ve had some of their trays for years and they look brand new. This kit comes with everything you need, and the color-coded trays are surprisingly helpful for keeping track of different plant varieties. This is professional-grade stuff made for home use.
The Downside: The initial cost is very high. It’s overkill if you’re only starting a dozen tomato plants.
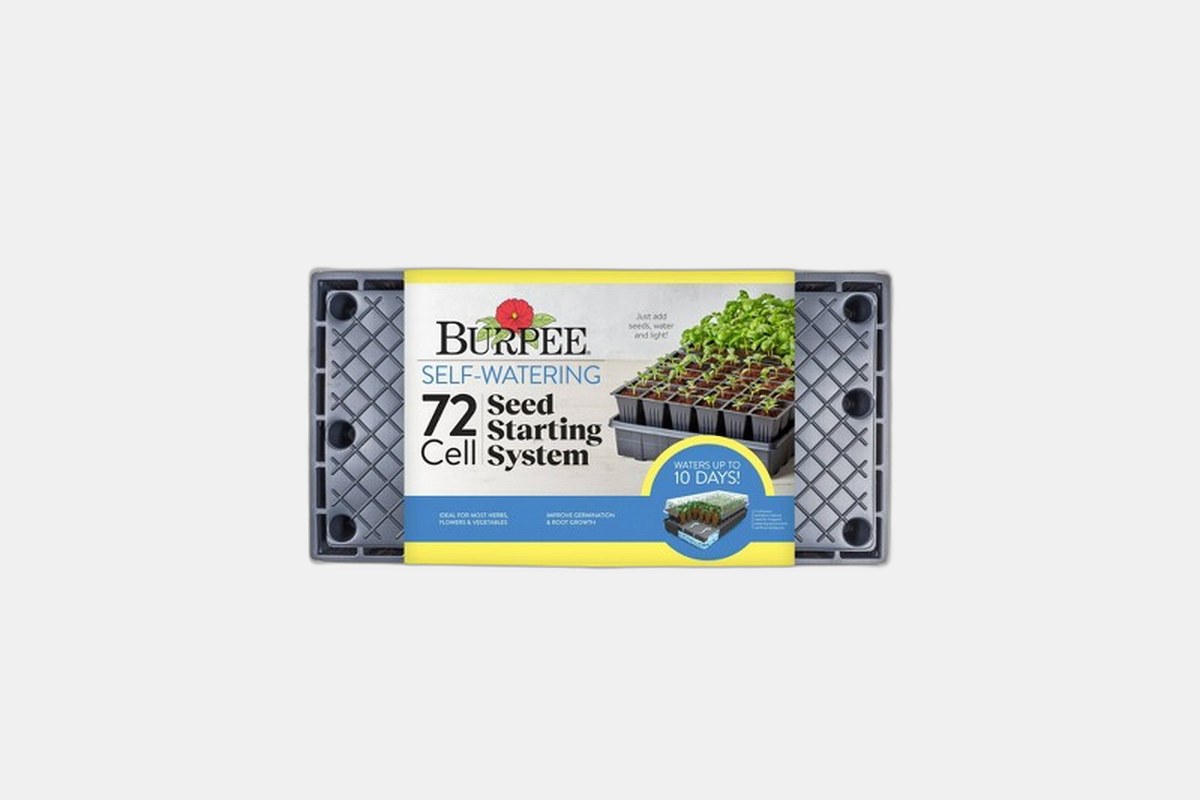
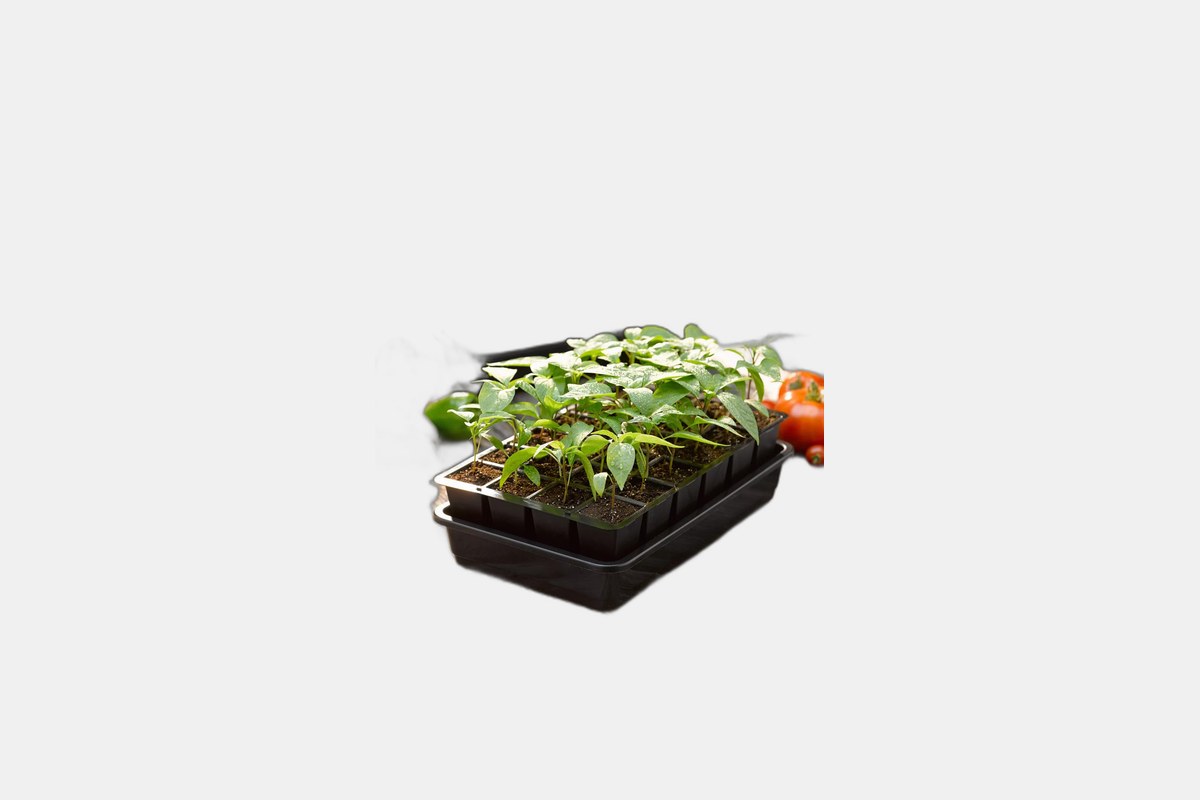
For about $35, the Burpee system lets you start a ton of seeds in a small space. The 72-cell insert is great for things like flowers or herbs where you want a lot of plants.
Like the Gardener’s Supply kit, this one uses a self-watering capillary mat. It’s a set-it-and-forget-it system that keeps the soil evenly moist, which is perfect if you’re busy or tend to forget watering. The humidity dome fits well and does its job.
The Downside: The cells are quite small. You’ll need to transplant seedlings into bigger pots sooner than with other trays, especially fast-growers like tomatoes or squash.

A single one of these mesh trays costs about $10. This isn’t a full kit, but a specialized tray for certain methods. If you make your own soil blocks, this is exactly what you need.
The mesh bottom allows for fantastic drainage and air circulation around the roots. I place this mesh tray inside one of Bootstrap’s solid trays for bottom-watering my soil blocks. It keeps them evenly moist without ever getting waterlogged. And like all their stuff, it’s so tough it feels indestructible.
The Downside: It’s just a mesh tray. To use it for watering, you have to buy a solid, no-holes tray to set it in, which is an added cost.
The biggest thing for me is durability. I got so tired of the flimsy black plastic trays that crack if you look at them wrong. Investing in thicker, warp-resistant plastic from a brand like Bootstrap Farmer has saved me money and frustration in the long run.
Think about how you like to water. Self-watering capillary mats are great for beginners or forgetful gardeners. But simple bottom-watering in a solid tray is often just as effective. Good drainage is key either way, so your seedlings’ roots don’t rot.
Finally, consider the cell size. Small cells are fine for lettuce or onions that stay small for a while. But for things like tomatoes, peppers, or squash that grow fast, you’ll want a tray with larger, deeper cells to give their roots room to develop before you plant them out in the garden.
The 10 Best Lawn Edgers
The 48 Best Gifts for Men
The 10 Best Succulent Soils
The 39 Best Hostess Gifts